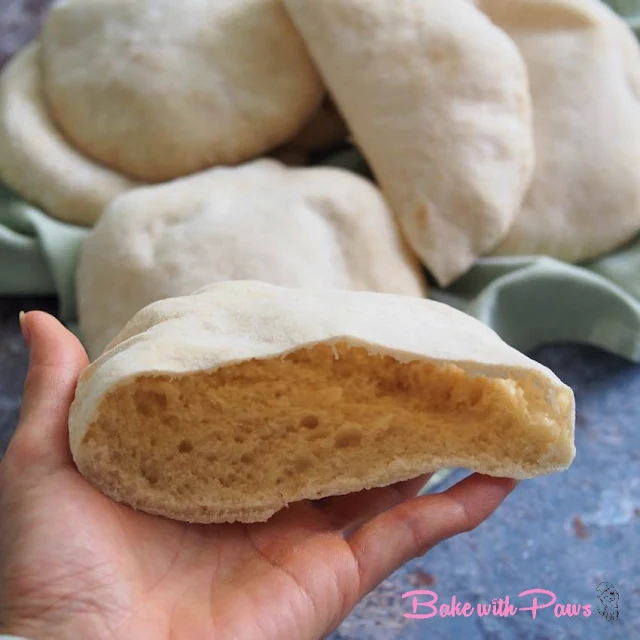
I made this Sourdough Pita using an easy recipe. The result is so satisfying especially when watching the pitas puff-up in the oven.
I kept the pitas in the fridge and consumed them over a few days. We only have to toast it or reheat it in a pan whenever we want to eat it. It tastes great served with a Greek Tzatziki sauce as a dip.
If you have any questions regarding this recipe or any other post, please leave me a comment in the “LEAVE A COMMENT” link and I will reply you as soon as possible. Do tag me on Instagram @Bakewithpaws if you attempt on this recipe.
Recipe - Sourdough Pita Bread
Yields: 8 pitas
INGREDIENTS:
270g bread flour (I used Japan High Gluten Flour)
55g wholewheat flour *
250g sourdough starter discard (from fridge)*
9g salt
150g water (please reserve 10 - 20g and add in later)
18g vegetable oil (I used extra virgin olive oil)
* Wholewheat flour can be replaced with all bread flour
* You may use newly fed active sourdough starter too.
Utensil:
Pizza Shovel Peel
Baking stone or steel
METHOD:
- Mixing and kneading @ 6.45pm
- Put all ingredients into a bowl of stand mixer.
- Slightly combine the mixture by hand with the hook attachment before turning on the machine so that the flour will not splash out.
- Knead for about 10 - 12 minutes or until the dough comes together and elastic. It is not required to check window pane stage as it is not soft sandwich loaf or buns. The whole kneading process, I stopped few times to scrape down the dough from the hook to be sure it is evenly kneaded and also to prevent the motor from overheating.
- 1st Proofing @ 7.00 pm:
- Round up the dough and place back in the same bowl, keep it covered with clingfilm or use a lid. Let the dough proof for about 2 hours on the counter (at room temperature 27C - 28C). The dough rose about 30% - 50% in size.
- Transfer to fridge @ around 9.00 pm and cold retard overnight for 12 - 15 hours.
- Shaping @ 10.00 am:
- Remove the dough from the fridge and leave on the counter for about 30 minutes to return to room temperature.
- Transfer the dough to a clean floured surface then divide dough into 8 equal portions (about 94g each). Please use a kitchen scale if you want to be exact. Form each portion to a ball. Cover with kitchen towel and rest for 15 minutes.
- Flatten a dough ball with rolling pin to about 6" - 7" diameter and less than 1/4" thick circle. Let the pita dough rest on parchment paper. Repeat the rest of the dough until finish.
- Final Proofing
- Let the pitas rest for 10 - 15 minutes.
- Baking:
- Preheat oven at 260C (top & bottom heat) with baking stone or steel for 15 minutes.
- Transfer the pita dough using Pizza shovel peel and place on baking stone. I bake 2 pitas at one time.
- Bake in a preheated oven for for about 3 - 5 minutes. The pita should puff up after 1.5 - 2 minutes.
- Remove pitas from the oven and wrap in a kitchen towel to keep warm.


