

Ingredients
- 2 cups of sourdough starter (We have a recipe for sourdough starter.)
- 1 1/4 cups warm water
- 1/2 Tablespoon active dry yeast
- 1 Tablespoon Kosher salt or coarse sea salt
- 1 teaspoon of olive oil
- 4 cups of flour
- 1 Tablespoon of chopped dried rosemary
1. Dissolve the active dry yeast in the warm water for 1 to 2 minutes and then add to the mixing bowl.
2. Add the starter and mix it into the yeast and water mixture for approximately 8 minutes with a dough hook on medium speed.
3. Add the remaining ingredients and use a dough hook on medium speed for approximately 10 minutes.
3. Remove the bowl and cover it with a warm damp cloth to allow it to rise. It will take about 3 hours to rise.
4. Spray the bottom and sides of your large Dutch oven with cooking spray or line it with parchment paper.
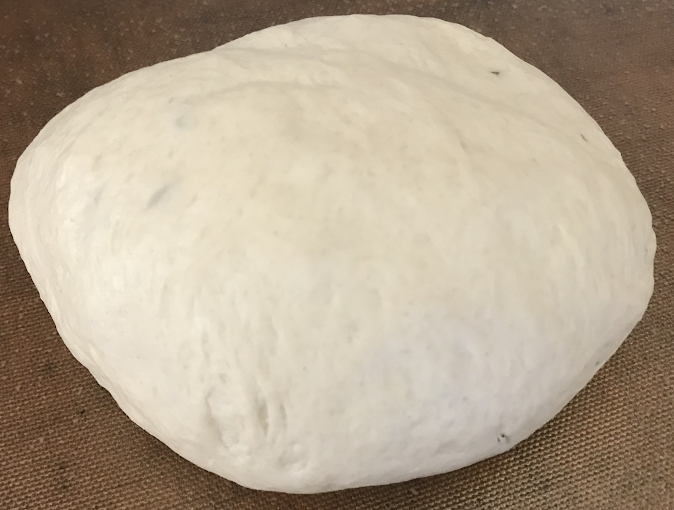
5. Remove the dough and knead to redistribute the yeast. Shape it into a ball and then add it to your large Ditch oven and cover it with a clean and damp warm towel.
6. Allow the dough to rise again. The amount of time is up to you, but we typically allow it to rise for 2 hours.
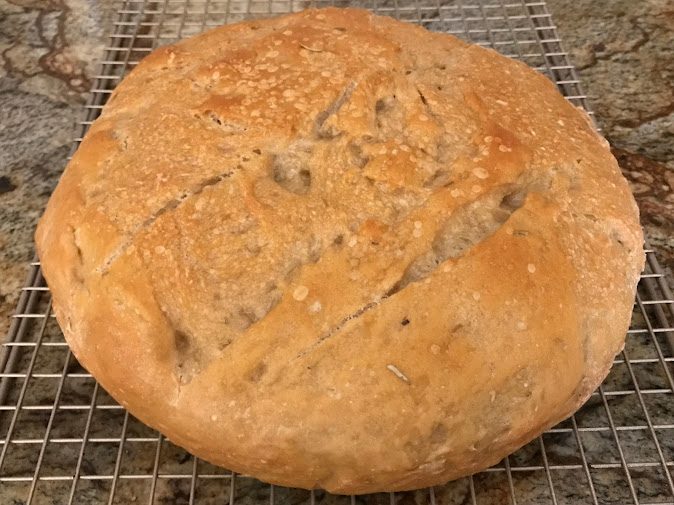
7. Coat the surface of the dough with the olive oil. You may also want to optionally sprinkle coarse sea salt and/or herbs on the top. Score the top of the bread with a knife by creating an X or hash marks.
8. Preheat the oven to 450 degrees.
9. Bake for 30 minutes with the lid on the dutch oven. Please note that our Marquette Castings Dutch oven lid and handle are oven safe for the temperature in this recipe, but if you use a different brand, you'll need to check on that issue.
10. Reduce the temperature to 375 degrees and bake with the lid removed until the bread is browned and thoroughly cooked. A way to check this is to use a baking thermometer and check if the inside is 200 F.
11. Allow to cool on a baking rack for 45 minutes. As tempting as it is, you'll want to allow the bread to cool because this allows the interior to finish cooking.
12. Enjoy within a couple of days or freeze extra bread. Remember that this bread is not packed with the same preservatives that you find in many shelf stable breads at the grocery store, so you'll want to freeze extra bread from this recipe.