This asiago bagel recipe Is an excellent Panera copycat for their Asiago Bagels.
A long, slow rise gives them a lovely chewy texture, and as far as Im concerned, these homemade bagels are better than Paneras.
Are You Really a Pastry Chef?
After working 16 years as a special education teacherheck, I even have a Masters degree in behavioral and emotional handicapsI attended culinary school for patisserie and baking.
Both during school and then after graduation, I worked in fine dining restaurants as pastry cook first and eventually as pastry chef.
So yes, even though I no longer work in a professional kitchen, I have worked as a pastry chef.
Im legit, if kind of messy.
Before those pastry chef jobsthough, there were two others in food service.
Job One
I worked as a baker in a start-up bakery/breakfast place. That bakery shut down after just a few months, so I wont dwell on it.
The highlight, though, was being able to make pretty much whatever I wanted for the pastry case.
Job Two, Slicing Bagels at Panera
Panera.
They handed me a hat, made me buy khakis and black polo shirts, and Iworked the register on the pastry side of a super busy Panera in the swanky part of west Orlando in the mornings before wolfing down a Frontega Chicken Sandwich, changing into my chef whites in the restroom and heading off to class just ten minutes down the road.
At 6:30 every weekday morning, I was met with an endless stream of bleary-eyed and ravenous commuters in dire need of a latte and an orange scone.
And asiago cheese bagels.
I learned to work that register like nobodys business. I knew where everything was on every screen and I could ring folks up lightning-fast. Until theyd change the screens.
Pretty much everything at Panera is made at a local-ish Panera commissary then delivered to the stores for final baking. Night bakers would come in and bake off tray upon tray of chewy baguettes, bread bowls for soup, focaccia, sourdough. all the different cookies and Danish, and hundreds of bagels.
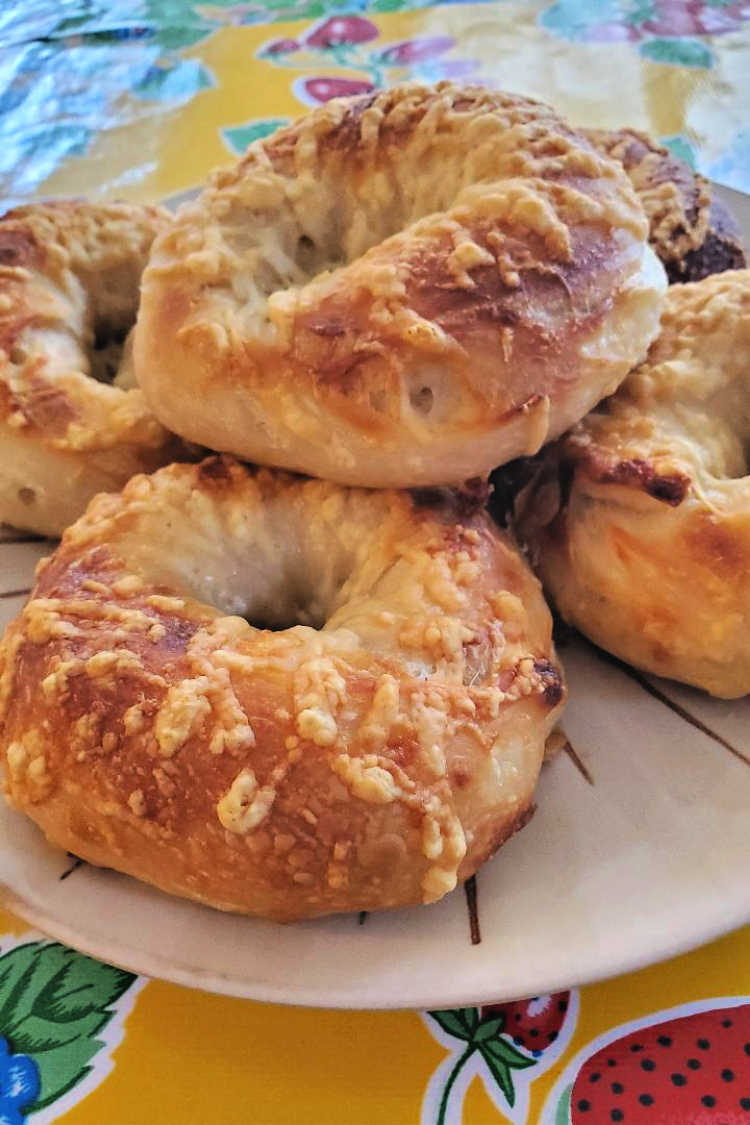
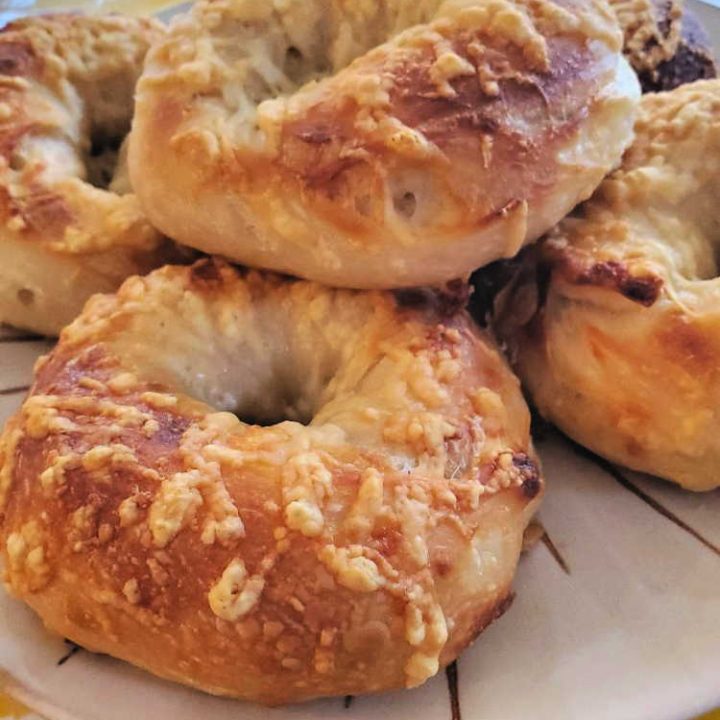
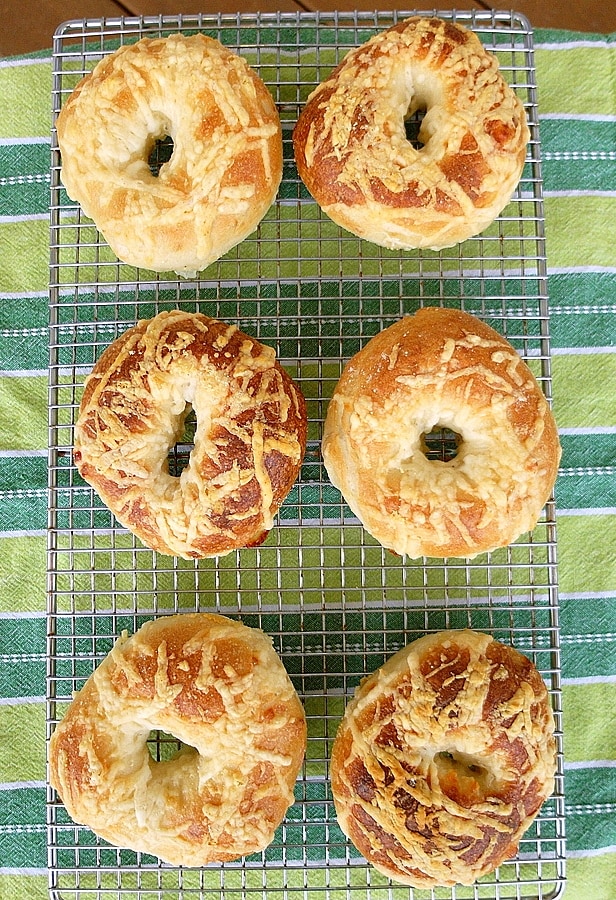
These asiago bagels were the most popular at the Panera I worked at, and they are very popular here at home!
Panera Bagels
But the bagels. Huge.
Maybe softer than a New York bagel, but size counts.
The most popular bagels we soldby a long shotwere asiago bagels.
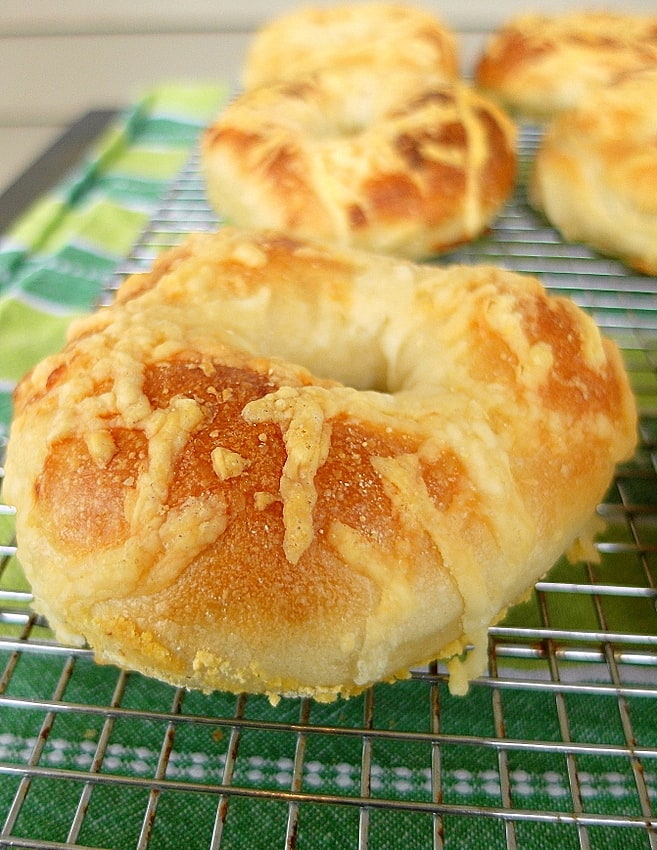
Shredded cheese in the dough.Shredded cheese baked to golden perfection on top of each bagel.
Sometimes wed pull them off the trays and little shelves of cheese would jut out from the bottom.Those were real winners, those cheese shelf bagels.
So, as an ode to my time working at Panera Bread, I give you Panera Copycat Asiago Cheese Bagels.
Letting the dough hang out in the fridge overnight definitely improves the chew of the finished asiago bagels, but if you dont have the time (or cant wait), you will still be very happy with your results.
My Asiago Bagel Recipe Template (and Tweaks)
Since I had never made bagels before, I wanted to stick with a trusted recipe.
I generally like to find a few inspiration recipes and then do my own thing, using the recipes as a jumping off point.
This time, I stuck pretty close to the script. And the script was asiago bagels from Brown Eyed Baker.
Michelles recipe is based on a Peter Reinhart recipe, and as far as Im concerned, bread doesnt get too much more legit than that. (I knowI have and adore his Perfect Pan Pizza cookbook.)
He even assisted her in adapting his basic recipe to an asiago version via email.And thats more than enough for me. He literally wrote the how-to of bagels.
The only things I did differently than the original recipe is:
I used dry malt powder from the brewing store rather than malt syrup. Malt syrup is super, super sticky and thick and messy, and malt powder isnot. The flavor is the same though, so thats what I went with.
I diced the cheese for mixing in the dough in about 3/16-1/4 dice rather than shredding it. I wanted wee pockets of melty-cheesy goodness. It was more of a pain to incorporate the wee cubes of cheese into the stiff dough, but I think it was worth it. The flavor will be the same if you shred it though, so do what you feel led to do.
Does Rise Time Affect the Bagels?
I also did an experiment, mainly because I was hungry and didnt want to wait until the next day to enjoy bagels.
I split the recipe in two and allowed half the bagels a 5-hour rest in the fridge after shaping and the other half a 15-hour rest.
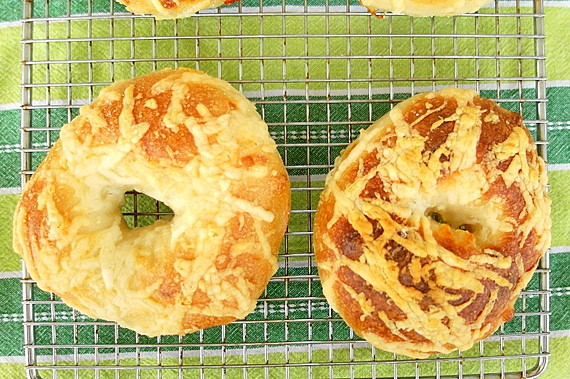
The results? The two batches look almost identical, but the bagels that were allowed a longer rest in the fridge had more chew, definitely.
I wouldnt sneak either batch to the dog or anything (if I had a dog), but given the choice in the future, Ill go with the overnight rise.
If you like a morepillowy?bagel, 5 hours in the refrigerator is more than sufficient.
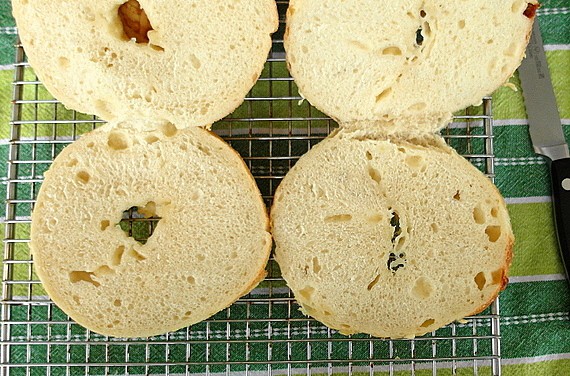
The asiago bagel on the left is a 5-hour guy. On the right is his 15-hour friend. Both have a gorgeous tight crumb (except for the pockets left by the melting cheese). The 5-hour bagels are kind of springy but not fluffy while the 15-hour bagels are nice and chewy.
Even though I preferred the 15-hour asiago cheese bagels to their 5-hour friends, I had no problem enjoying both kinds!
Can You Freeze Asiago Bagels?
Absolutely. I like to slice mine once they have cooled completely and then store them in a freezer bag in the freezer.
When I want one, Ill thaw it in the microwave, which only takes about 15-20 seconds, and then open it up and toast it in my toaster oven. If you dont take into account all the mixing and rising and whatnot, homemade bagels are the perfect convenience food!
Other Breakfast Bread Recipes To Try
If youre a fan of a good carby breakfast, give these other recipes a try.
The original recipe called for the addition of 17 oz of bread flour to the sponge.
I stopped at 15 oz because I could just tell that if I kept going Id end up with Spackle. Im writing the recipe with the exact measurements I used, but know that you may have to fudge just a bit either way depending on the humidity and such at your house.
Heres how to make these asiago bagels.
How To Make Asiago Bagels
I highly recommend toasting your asiago cheese bagels. And then slathering them with as much cream cheese as theyll hold. Theyre also good topped with hummus!
If youre a fan of asiago cheese bagels and you like the sound of these, please consider rating and/or commenting. I love hearing from readers! And if you make these (with a 5-hour or 15-hour rise), please share a photo on Instagram using hashtag #pcorecipe or to the Pastry Chef Online Facebook group page. I cant wait to see your version!
Asiago Cheese Bagels
Yield: 12 bagels
Prep Time: 30 minutes
Cook Time: 16 minutes
Rest Time in the Fridge: 15 hours
Total Time: 15 hours46 minutes
Bagels are not difficult to make, but they do require some time and the ability to deal with the fact that the dough is pretty stiff. That's the way it's supposed to be. The payoff--biting into these asiago cheese bagels--is totally worth the work!
Ingredients
For the Sponge
1 teaspoon active dry yeast, (you can also use instant which is what the original recipe calls for)
18 oz bread flour, (I used King Arthur)
20.3 oz filtered water at room temperature, (it is very cold in my kitchen right now, so I heated my water to about 80F)
For the Dough
all of the sponge
1/2 teaspoon active dry yeast, (or instant. See above)
15 oz bread flour
2 1/2 teaspoons kosher salt, (yes, you need this much. Don't skimp on the salt)
2 teaspoons dry malt powder or 1 Tablespoon malt syrup, (or honey or dark corn syrup)
6 oz asiago cheese cut into small dice, (or shredded)
To Finish
wide pot of water
1 Tablespoon malt syrup, dark corn syrup, or honey
5 oz asiago cheese, shredded
Instructions
For the Sponge
Combine the yeast, flour and water in a large bowl. Stir well to combine completely. It will be the consistency of a thick batter.
Cover and let rise at room temperature for 2-3 hours, or until it has more than doubled in bulk and is very, very bubbly. It should be so bubbly that it collapses if you give the side of the bowl a whack. How long it takes to achieve this will depend on the temperature in your kitchen, but it will probably take at least 2 hours.
For the Dough
Combine the sponge and the rest of the ingredients except the cheese in the bowl of your heavy duty stand mixer. (Unless you're making the dough by hand, do not try this with anything but a powerful stand mixer. My poor old 5 quart KitchenAid became alarmingly hot during kneading and threatened to die. The motor even momentarily would stop turning the dough hook. This dough is Serious.)
Mix on low speed until all the flour is incorporated and then turn the mixer up to medium-low speed and knead for 6-8 minutes. The dough will be firm yet supple. At the end of kneading, it should be very smooth and very extensible and not at all sticky.
Give it the windowpane test to make sure the gluten is good and developed.
Knead in the cheese by hand. This might take awhile, but just go for it.
Divide the dough into 12 equal pieces. Mine scaled out at 4.75-4.8oz each.
Form each into a smooth ball and let rest, covered for 20-40 minutes. (20 minutes for a warmer kitchen. 40 for a cooler kitchen. My kitchen is currently about 65F during the day)
After the rest, shape the bagels.
To Shape the Bagels (See NOTES for a simplified method of shaping)
Press one of your pieces of dough down flat so it looks sort of like a tortilla about 6" diameter.
Fold two of the "sides" in about an inch and pat down.
Roll up the piece of dough like a burrito and place it back on the sprayed baking sheet, seam side down.
Repeat with the rest of the dough.
Then starting with the first piece of dough, roll it out into a snaked about 10-12" long.
Wrap the dough around your hand, overlapping the edges by an inch or two. Have the overlap be on the palm side of your hand.
Put your palm down on the counter (with the bagel still wrapped around it) and roll the overlapped part of the bagel firmly back and forth on the counter to make sure the dough sticks.
Place the proto-bagel on a sprayed baking sheet.
Put six bagels on one tray and six on another.
Lightly spray the tops of the bagels with cooking spray, cover them with plastic wrap and let them sit for 20-30 minutes (again, depending on the temperature of your kitchen).
You don't want to see any more rising, but you'll know they're ready for a rest in the fridge when they float in a dish of water. Just test one. If it sinks, give it a few more minutes of rest time (but do dry that guy off with a paper towel) If it floats, it's a witch. No. If it floats, it won't be like lead when you bake it. So once your tester guy floats, dry him off, re-spray and then put all the bagels in the fridge for a nice, long rest.
Refrigerate the bagels for at least five hours and preferably longer, up to about 36 hours. I went with about 16 hours and they were gloriouis.
To Finish the Bagels
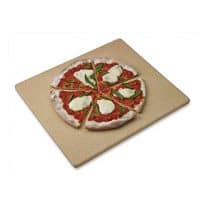
When ready to bake, preheat the oven to 500F with a rack in the center of the oven. Put your pizza stone in the oven to preheat. You'll be baking directly on it.
Heat the water to a boil and add the malt syrup or corn syrup.
Pull one tray of bagels out of the fridge and leave the other in there.
Have your baking stone heating in the oven
Boil the bagels, two at a time, for about 10-15 seconds on each side. I started with the top side up, then flipped so the top side was down. I fished the bagels out of the water with a skimmer, let them drain for a couple of seconds and then flipped them over onto the cornmeal-dusted pan so the top side was up again. Tada!
Right after boiling, liberally sprinkle the top of each bagel with some of the shredded cheese.
Once all six bagels are boiled and topped, use a metal spatula to transfer each to the baking stone and bake for 8 minutes at 500F.
Turn the pan 180 degrees and bake another 8 minutes. You're shooting for an internal temperature of about 200F, so keep an eye on them. NOTE If you like a bagel with a bit less color, turn the heat down to 450 for the second half of the bake.
When done, use a metal spatula to remove them from the baking stone to a cooling rack.
Cool the bagels on the rack for at least fifteen minutes before slicing and serving. I prefer to let them cool all the way so the structure has a chance to completely firm up before slicing and toasting.
Boil and bake the second tray the same way as the first.
To keep them very fresh, cool them completely, slice them (or not), and then store them in heavy-duty zip-top bags in the freezer. They thaw in about 25 seconds in the microwave.
Notes
An Easier Way to Shape the Bagels
Poke your pointer finger into the very center of the top of one of your smooth balls of dough. Poke it all the way through and then have your other pointer finger join the first one. Pull your fingers apart and rotate them, gently stretching the dough as you go. I stretched mine out so my fingers were probably 4" apart.
Once you shape the bagel, place it on the sprayed tray and press it down just a bit. Repeat with the rest of the balls of dough.
Recommended Products
As an Amazon Associate and member of other affiliate programs, I earn from qualifying purchases.
The stated nutritional information is provided as a courtesy. It is calculated through third party software and is intended as a guideline only.
Whats your favorite kind of bagel? And whats your favorite thing to top a bagel with?
Cant wait to hear your responses.
Have a lovely day.
This post contains affiliate links. If you make a purchase through one of my links, I will earn a small commision. Your price is unaffected. Please see my disclosure policy for more information.